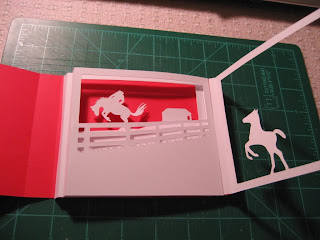
These cards all have several things in common. There are 4 pieces, not including the envelope. The colored card base is 11 inches wide by 5-1/2 inches tall. And the base are 3 kiss cut lines at 4.75 inches, 5.5 inches and 10.25 inches, measuring from the left side.
The other 3 pieces are the layers, called panels - front, middle and back. In this example, the rearing colt is the front panel, the fence is the middle panel and the cowboy riding the bucking bronco and the barn are in the back panel. Each panel is 5.25 inches wide by 4.25 inches tall. There is a kiss cut line on both sides of the panel 1/4 inch from the edge.
The back panel is attached first.
The 1/4 inch edge on the right side of the panel is glued to the card base so that the farthest right edge is aligned on the second kiss cut line of the card base. Note that the picture shows the reverse of the back panel.
Fold the back panel along the kiss cut line and lay it flat to the card base. Glue the middle panel so the farthest right edge abuts the back panel.
Fold the middle panel along the kiss cut line and lay it flat to the back panel and card base. Glue the front panel to the edge remaining, aligning the kiss cut line to the outer right edge of the card base.
Now it's time to secure the left side of each panel to the card base. Pick up all the panels and fold the card base at the kiss cut line on the farthest right side. This will align the left side of the panels for gluing. Fold the kiss cut line on the left side of the back panel to form a right angle. It's easier to do this next part upside down. Glue the back panel to the card base aligning the far left side of panel to the kiss cut line on the card base.
Repeat gluing the left edges of the middle and front panel to the card base, aligning the edges right next to the previous layer's kiss cut line. The panels should look like the above picture when done. To get the 3D effect, pull on the right piece of the card base.
Here's the view from above. You can see that each panel is 1/4 inch apart. And yet, when closed, the card is flat and fits in a standard envelope, perfect for mailing. I hope you'll give it a try! Next I'll show how to create the panels in the Pazzles Inspiration software.


makes a very nice image
ReplyDelete